Thursday, November 29, 2012

Frittata is not an f-word to keep to yourself! Sexy Vegetarian Thursday.

                                   
                                          You wanna make this bad boy your friend. Trust me.

As I've said in other posts, I was raised in a family that made simple dishes with simple ingredients (to be honest, my parents could successfully make a total of 3 yummy dinners between them. My mother won't take offense to this because she knows it true. She can, however, bake a mean cookie). When I ventured into the wide world of cuisine, I tread with caution. I was overwhelmed by new terms like quiche, meringue, aioli, and tartare; I'm still figuring it all out!

Frittata used to be one of those scary words. I knew it was similar to an omelette, so I thought, why don't I just make a freakin omelette? I know what that is! Finally, curiosity and a persistent need to challenge myself won out: I found a simple recipe and gave it a try. I discovered the fluffiest version of an omelette you can imagine! The frittata I am sharing with you today is filling, hearty, and vegetarian. It makes for a light dinner but would make a perfect addition to brunch.


Onion Potato Frittata

                                         Add 1 Tbs. olive oil into a skillet over medium heat.
                                        Slice half an onion and one potato thinly. Add to skillet.
                                             I like to add 1/2 tsp. of Bell's Poultry Seasoning.
                                     Cook until onions are browned and the potatoes are soft.


                                      Beat 6 eggs with 1/2 cup milk.  Add thyme, salt, & pepper.
                                      Arrange potatoes & onions so they evenly coat the skillet.
                                       Pour the eggs over the vegetables. Cook for 5 minutes,
                                                            or until the bottom is firm.


                                       Top the egg with shredded cheese, whatever kind you like!
                                                 Place the skillet in the oven under the broiler.
                                       Cook for 3 to 5 minutes until the top is firm and browned.
                                             
                                         
                                          Cut into eighths. I usually serve two slices per person.

Clean Cucumber Salad

This is the crisp, light salad I serve with a frittata for dinner. It takes about 2 minutes to put together and is a great way to get in fresh vegetables.


                                                 Cut one large cucumber into small chunks.
                                         Add 2 Tbs. of lemon juice and 2 tbs. of white vinegar.
                                          Stir in salt, pepper, and a pinch of dill weed to taste.

Wednesday, November 28, 2012

How to whoop a cold!

Hello, friends! I hope you feel much lovelier than I do at the moment as I am in full-on sicky mode. A sicky, of course, is a person who feels like a steaming pile of elephant dung. That has been trampled by other, angry elephants. Very angry. I like to use sicky as a noun, an adjective, even as an adverb. But enough of my nerdiness and onward to my homemade-ness!

I've been fighting a cold for a few days now, and I am desperate to feel better so I can spend the weekend at a friend's house without fear of infecting her with my nasty germs. I detest taking medications, especially for things like head colds or achy muscles. I want to share what I've been doing to kick this cold's bum. I am:
  •  attempting to get a lot of sleep, but not being able to breathe through my nose as I prefer to do has put a major damper on that. (Plus, Mr. J's snoring has been amplified since he is sick as well, though he doesn't want to admit it.)
  • getting that blood circulating with exercise and fresh air. In addition to taking a quick stroll on my way to drop off some paperwork today, I played an intense game of pinball with my after school teens and worked up quite the sweat. It wasn't very attractive what with my sniffling, suppressed coughs, and pale complexion. I'm sure I was quite the sight.
  • taking my multivitamin religiously every day and eating more fruits and vegetables.
  • cutting back on the dairy to help prevent extra mucus production.
  • drinking lots of fluids, especially hot tea and at least 8 glasses of water a day.
Additionally, I wanted to share two of my GET WELL SECRETS with you.

Hot Toddy


I discovered this beauty when I had the flu in London three years ago (during the redonkulous swine flu scare in the States...thought my family was going to shite a brick). A hot toddy soothes my throat and helps clear my sinuses. And it gives me a fabulous excuse to have a drink after work :)

In a large mug or glass, pour a shot of rum or whiskey (1.5 oz).
Add in 2 Tbs. of lemon juice.
Add a black tea bag and pour hot water over the bag to fill the glass.
Stir in 2 tsp. of honey.

Stir well and enjoy!


Simple Detox Bath


 Mix 1 cup of Epsom salts and 1 cup of baking soda together.
While running a hot bath, pour half (1 cup) of this mixture into the water.
Agitate the water to dissolve the mixture.
Soak for 30 minutes and drink a huge glass of water afterward.
The goal of the detox bath is to help you sweat out toxins that build up in your body from processed foods, 
         hair products, makeup, home products, etc.
I feel exhausted after this bath, but the next morning I feel so invigorated and refreshed!
Use the other half a few days later!

Take care and feel better! xo

Monday, November 26, 2012

MIY Ranch Seasoning Mix and Dressing

You may be wondering if the "MIY" in the title is a typo: I put it there with a purpose, friends. MIY stands for make it yourself! This sentiment could also be phrased as "try your hand at old-fashioned goodness," or, "don't be a lazy ass," or, "stick it to the food corporation man." Perhaps, "find your own Hidden Valley" suits some of you. Whatever floats your boat.

I made the transition to homemade ranch seasoning mix and ranch dressing some months ago, and I have not once gone back to store bought ranch products! Even Mr. J, who is a ranch fanatic and refuses to eat pizza without ranch dressing, is a complete convert.

Making seasonings yourself, whether it be ranch or taco mix, gives you complete control over what goes into them and when they are made. YOU get to select the ingredients and adjust the flavors to suit your taste buds. What could be better than that?


Ranch Seasoning Mix

In a blender, combine until smooth:

   1/2 cup dry buttermilk (try Saco Cultured Buttermilk Blend)
   1 Tbs. dried parsley, crushed
   1 tsp. dried dill weed, chopped
   1 tsp. onion powder
   1 tsp. dried onion flakes
   1 tsp salt (you might want a dash more)
   1/2 tsp. garlic powder

   1/2 tsp. ground pepper

Use 1 Tbs. of this mix when a recipe calls for an envelope or ranch dressing mix.


To make ranch dressing:

Combine 1 Tbs. ranch seasoning mix with 1 cup mayonnaise or Greek yogurt. Whisk in 1/2 cup of milk SLOWLY. This is the recipe I use for the ranch Mr. J likes with pizza because it's consistency is very close to that of Ken's or Hidden Valley. Refrigerate before and after use. Should last up to 10 days to 2 weeks in your refrigerator. Because there are no preservatives, I would not use it after 2 weeks.

Add another 1/2 cup of milk for a thinner dressing you could use for potato salad.

Enjoy! xo


Friday, November 23, 2012

Happy Turkey Day!

Hi, everyone!

I hope you all had a fabulous Thanksgiving with your families!

If you celebrate Thanksgiving, that is.

If you don't, then I hope you had a lovely, um, Thursday.

Yeah.

Anyhow, I realize that due to eating copious amounts of turkey, I couldn't post a Sexy Vegetarian Thursday meal. I will, however, do that next week!

In the meantime, I am planning some other posts, and I wanted to update you all on what I've been doing. Outside of working my full time job and volunteering 6 hours a week at a local teen drop-in center, I have been working diligently on homemade Christmas gifts.

(Because my family and friends read this blog, too, I can't share what those gifts are until after the holiday season. In the new year, though, you can count on me to share tutorials and recipes with you!)

This coming week, look for some sewing posts: I plan to re-size some clothing that are too big for me. And I might do some makeup review posts, too. Let me know what you all think about that idea!

Much love! xo

Monday, November 19, 2012

DIY Taco Seasoning, also known as taco crack

*Postscript: This post was edited on 2/25/13 to reflect changes I made to the recipe.* \

Hiya, friends! Hope you all had a lovely weekend. Sadly (or fortunately?), I didn't see the new Twilight movie as it was completely sold out by screaming tweens and cougars. Such is life! To make up for it, I am making ground turkey tacos tonight!

Just a few short months ago, Mr. J and I ventured into the world of DIY spice mixes. We haven't looked back. We make our own ranch seasoning and dressing, taco seasoning, pumpkin and apple pie spice mix: the homemade stuff is so much tastier than the store bought crap. PLUS, you know exactly what's going in. None of this, "what the hell is this chemical I can't pronounce and why is it in my taco mix?!"

I highly recommend you go to your grocery store's bulk spice section (you will literally spend only a couple dollars) and pick up the ingredients you need to make DIY homemade taco seasoning:

                                The aloe plant is not necessary, but it adds to the festive atmosphere.

 2 Tbs. chili powder
1/2 tsp. garlic powder

1/2 tsp. onion powder
1 tsp. red pepper flakes
1/2 tsp. oregano
3 tsp. paprika
2 Tbs. cumin
2 1/2 tsp. salt
2 tsp. black pepper

Mix the ingredients in a small bowl and store in an airtight container. I bought this cute little glass jar at The Christmas Tree Shop for $0.25! You can make this to your taste by adding more pepper flakes or reducing the salt. Make it truly your own!

Use 2 Tbs. of mix per pound of meat.

Happy cooking xo

Saturday, November 17, 2012

Flower Headband Tutorial

Happy Saturday, everyone! As I am about to head out the door to have a girls' day with a dear friend full of shopping, eating, and Twilight watching, it seems only natural to share a very feminine headband I made the other night.

I apologize in advance for the crap pictures. Now that it's flippen dark at 5pm, I obviously need to put better lighting in the craft room. Grrr, winter.

How to make a flower headband!

 Here's what you need: ribbon (to make the flower, or two pre-made flowers), lace, 3/8" braided elastic, scissors, measuring tape, hot glue gun, pins, pearl beads, needle, thread, and felt.

Cut a 19" piece of elastic--this is an average one size fits all for teens and adults. You can seal the cut edges by holding them close to, but not it, a flame. Overlap the two ends by at least 1/2"--be sure the elastic isn't twisted!

 I love this totally useless picture. Use your needle and thread to sew a few stitches through the overlapped ends. You've just created your headband!

 Another fabulous pic courtesy of me at 11pm... Put the headband on and use pins to mark where you want the embellishment to be. Cut two squares of lace elastic that are just a bit bigger than your flowers. Use your hot glue to attach the lace pieces to the backs of the flowers.

 Remove your marking pins and hot glue the flowers to the elastic (show on the left side). Warning: it's pretty likely you'll burn yourself at this point. I have the marks to prove it. Let's hope you're less clumsy than me.

Cut two pieces of felt the same size as your flowers. The felt serves two purposes: to ensure your flower stays on the elastic, and to cover the ugliness underneath the flower. Glue the felt circles to both the elastic and the flower, as shown on the right side of the photo above.

 Use your needle and thread again to tack down some pearl beads for extra embellishment. I added four on either side of the flowers and three between the flowers.

                        VOILA! You've created a totally unique headband for yourself or a friend.

Sometime soon, I will post a tutorial on how to make ribbon roses! Promise!

Thursday, November 15, 2012

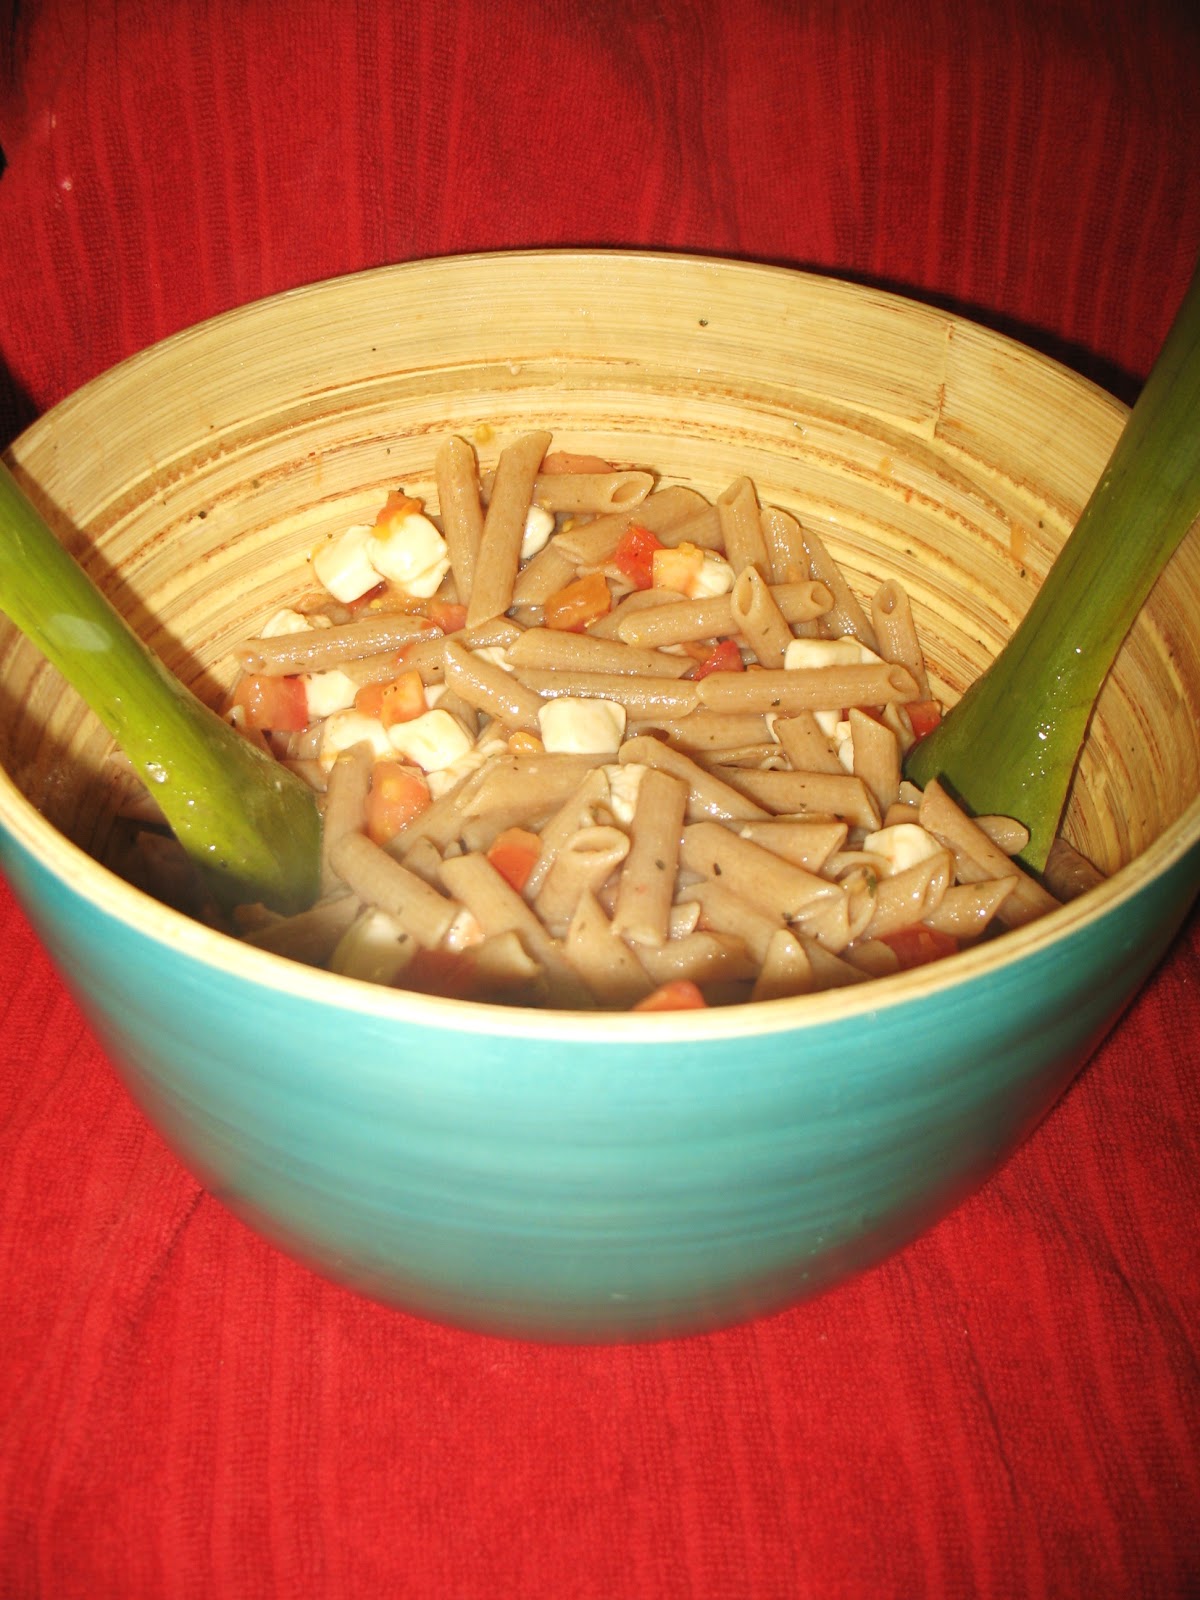
First Ever Vegetarian Thursday: summer tomato pasta!

I find vegetarian meals sexy. 

You may be thinking, is sexy too strong a word in this scenario? What could possibly be so sexy about meat-less food? (Anyone else laugh like a 12-year-old boy at that sentence?)

Darlings, sexy is completely appropriate in this context! (Now I'm beginning to wonder how many sitophiliacs will find this post...) Something that's sexy is attractive, physically appealing, exciting, interesting, svelte, and maybe a bit out of the ordinary. 

Vegetarian meals are definitely all of the above for me. I was raised in a meat-and-potatoes household within a sheltered, tiny town. The only night of the week we didn't have some sort of animal-based protein was "fend for yourself" night when my parents didn't want to cook so my sister and I ate 2 bowls of cereal--you know what night I'm talking about. 

I was almost 18 years old the first time I encountered tofu, sprouts, and soy milk. After I experimented with vegetarianism for over a year in college, I love the freshness and lightness of many vegetarian meals. Now that I'm the one in charge of meal-planning, Mr. J and I eat at least 2 vegetarian meals a week (ideally, it'd be more like 3 or 4). Mr. J, while an adventurous eater, is definitely a hamburger guy; conversely, I would be happy eating mostly vegetarian with the occasional lean protein. 

Luckily, summer tomato pasta is a meal we both love. We tend to ignore the fact that the word summer is in the title and eat this dish well into fall or even winter if we can find good, fresh ingredients to use. This is my adaptation of a recipe from the cookbook Vegetarian, edited by Nicola Graimes.

Summer Tomato Pasta 

Cook 1 pound of whole wheat pasta. 

While the pasta cooks, cut 2 large tomatoes and 10 oz. of mozzarella cheese into roughly 1 inch cubes (really, whatever size you want). 


 Place the tomato and mozzarella cubes into a large serving bowl. Add the juice of 1 lemon, 1/4 cup of olive oil, fresh or dried basil leaves, salt, and pepper. Throw in an additional Tbs. of white vinegar if you want a little more bite. Let the cubes marinate.


 Drain the cooked pasta and dump it directly into the serving bowl. Toss to coat the pasta.


                      Serve your delicious vegetarian meal to an adoring crowd.

Wednesday, November 14, 2012

Healthier Chicken Enchiladas: delicioso!

Let me cut to the chase: this is one of my and Mr. J's favorite meals. It's relatively healthy, inspired by this recipe, and a great alternative to your typical taco night. This is also a fun recipe to play with: you could easily use my steps below to create turkey, beef, or vegetarian enchiladas. Add extra filling ingredients like veggies or rice, and finish it with your favorite combination of cheeses :)

Fun fact: a traditional enchilada is a filling wrapped in a corn tortilla topped with a pepper sauce. Olé!


Chicken Enchiladas


                                   Boil 2 raw chicken breasts in 2 cups of chicken broth or stock
                                       seasoned with 1 Tbs. hot sauce, 1 tsp. chili powder, and
                                                   2 chopped garlic cloves for 20 minutes.


                         Drain liquid (freeze it for future chicken soup!) and shred chicken and garlic.
                              Add 1/2 cup sour cream, 1 tsp. hot sauce, 1/2 cup chopped onion,
                                               1 tsp. chili powder or cumin, salt and pepper.


                         Separate the chicken filling into 4 large tortillas (try homemade organic ones).
                         Wrap each tortilla by folding two sides toward the middle and rolling one of
                         the open ends towards the opposite open end. Did that make ANY sense?!


                                 Place the tortillas into a greased 9x13 baking pan. Pour a small can
                                 of medium enchilada sauce over them and top with cheddar cheese.
                                           Cover with aluminum foil and bake for 25 minutes.


                                 Drool over your amazeballs creation. Oh, and, you know, eat it.


Tuesday, November 13, 2012

Homemade Organic Whole Wheat Tortillas: say it in a sing song voice.

Call me crazy. Or domestic I-made-that-shit-myself goddess. I am, in fact, both, at least for today. Lately I've been known as goddess of stress-induced grumpiness. But not today, my friends!

I actually can't believe I pulled this one off. I pinned this recipe a couple days ago and decided to give it a whirl (did that remind anyone else of Home Alone when Kevin buys mac & cheese at the grocery store?? No? No one?....*crickets chirping*).

Here's what I did to make organic whole wheat tortillas from scratch:
  •   Mix 2 cups of organic whole wheat flour with 1 tsp. salt. Cut in 1/4 cup of organic butter.
  •   When it starts to look like crumbs or tiny clumps, slowly add 1/2 cup lukewarm water. (I actually needed about 3/4 cup.) The dough will be firm and might be clumped into a few pieces.
  •  Knead the dough for 3 to 5 minutes until homogenized. Cover dough ball (ha) in plastic wrap.
  • Refrigerate for at least 4 hours. Let dough come to room temp when you're ready to use it.
  • Roll the dough into balls. I made 9: 4 large, 5 small.
                                                       Roll each ball as thinly as you can.


                                            See? A baby and a mommy tortilla... I'm a doofus.


                         Heat an ungreased griddle until it's... hot. Cook each tortilla for 30 seconds
                                       on each side, or until there are a few browned spots, like so.


                                      Look at this beastie bubble! Take cover! Yarr she blows!


                                                     Here's my pile of scrumptious tortillas!

So, how much money did I save by making these bad boys?
2 cups of a 3 lb. bag of Bob's Red Mill Organic Whole Wheat Flour ($3.99 on sale): $0.66
1/4 cup (half stick) of Wegman's Organic Unsalted Butter (4 sticks at  $3.49): $0.43
salt and water are a given.
I made 9 tortillas.
Total cost: $1.09

6 Wegman's brand whole wheat tortillas cost $2.49. If I could buy 9 of them, it would cost $3.73.

This recipe saved me $2.64, more than the cost of the Wegman's package, and it only took me about 45 minutes to make! Woohoo!

Monday, November 12, 2012

Raise your hand if you love cheesecake!

My guess is that if you found your way here, you're likely a lover of cheesecake and all other divinely decadent desserts. Welcome to the club, new friend! I'm sure you'd agree that despite how delicious cheesecake is, it's hardly something to indulge in all the time unless you have an ungodly metabolism. More power to you if you do! However, the general rule of thumb in this house is that we gorge ourselves on it once a year when I make Mr. J a homemade cheesecake for his birthday. Our standby is strawberry, but he also loves caramel and we had a ton of vanilla beans left over from another project (I promise to post about that adventure soon!). While on the hunt for a new recipe to tackle, I found this one from Allrecipes.com. If you read it, you'll see that it makes way too much cheesecake batter. I altered it to fit our needs and tastes.

                                            I layered a bit of the caramel sauce onto the cheesecake
                                                       before baking. I recommend doing it!

Vanilla Bean Cheesecake

1 (18 oz) package of vanilla sandwich cookies
1 vanilla bean, cut lengthwise with seeds scraped out
1/4 cup butter, melted

3 (8 oz) packages of cream cheese, softened
1 can sweetened condensed milk
3 eggs
3 vanilla beans, cut lengthwise with seeds scraped out
1 Tbs. pure vanilla extract
1/4 tsp. almond extract
1/2 cup sour cream
1/4 cup heavy cream
  •   Preheat oven to 300 degrees. Lightly butter a 10 inch springform pan.
  •   Crush vanilla cookies into crumbs (you can pulse them in a blender or multitask by doing some anger management: put cookies in a sealed plastic bag and crush them with a rolling pin). In a bowl, use your hands to combine the crumbs, vanilla bean seeds, and butter. Press the mixture onto the bottom of the springform pan and halfway up the sides.
  •  Use a standing or handheld electric mixer to beat cream cheese for 3 minutes until it's smooth. Beat in the sweetened condense milk, then the eggs one at a time. Be sure to fully incorporate each egg before adding another. Add in the vanilla bean seeds, extracts, sour cream, and heavy cream. Beat on high for 1 minute.
  •   Pour the mixture onto the crust. Place cheesecake onto middle rack of the oven and bake for 1 hour and 20 minutes. Turn off the oven and let the cheesecake rest in there for another hour. Cover the cheesecake with a layer of plastic wrap and aluminum foil and refrigerate for at least 4 hours.

Homemade Caramel Sauce
(I am pretty sure I wrote this down while I was watching Sunny Anderson on the Food Network.)

3/4 cup sugar
1/4 cup water
1/2 cup heavy cream
1 tsp. vanilla extract

  •   In a small saucepan or small skillet, combine sugar and water and put on medium heat. THIS IS WHEN YOU DON'T TOUCH IT! You get to just leave it alone--how glorious is that! You want to watch it closely, though, as well as open a window or turn on your fan. You're burning, or caramelizing, the sugar: it tends to smell a bit unpleasant at this stage. 
  •   After about 5 minutes, the edges will turn golden brown. Pull off the heat and quickly whisk in the cream. Beware: it will froth up! Move your whisk very quickly to prevent a giant, hardened mess.
  •   Bring the mixture back to a boil. Stir for about 30 seconds. This helps homogenize the sauce and melt any hardened bits created when you added the cream.
  •   Pull off the heat. Add the extract. Allow the sauce to cool so it can thicken.
  •   Pour over a slice of the cheesecake.

                                                         Welcome to heaven, friends.

                                                    That's a hunka burnin love, right there.

Sunday, November 11, 2012

Blogging Virgin No More!

I've done it! 

I've taken a leap of faith and entered the mysterious world that is bloggery (at least that's what I like to call it. Hey, it's fun to say, I'm easily amused, and I have a strange habit of making up words. Makes sense to me! Although, the more times I say bloggery, the more it sounds like buggery. That reminds me of the time I called my London host mum's dog a "cute little bugger." Stateside, that doesn't mean much except that's he's adorable. My host mum, however, thought I was calling her dog gay or implying that poor little Oscar had a not so pleasant experience coming his way. Note to readers: use the phrase "getting buggered" VERY carefully in the UK. In fact, I heard Ralph Fiennes say that last night when I saw Skyfall! Holy crap, Daniel Craig is such a babe... Focus, woman!).

I've followed some of my favorite blogs for years now and all the while I thought to myself, can I do that? Will people take an interest in what I do in my spare time? I'm not a cool mom (or a mom at all), or a painter, or a designer, or a chef. What's so fascinating about my life? The truth is: not much. I'm a recent college grad who has a stressful, thankless job, can't figure out what to do with my future, trying to find the beauty in every day life. Then I thought about how most of the bloggers I follow are average, every day people who have a sense of humor, a few talents, extra time on their hands, and a desire to feel connected. Once I came to that realization, I told myself to grow a pair and put myself out here to see what will happen.

This little bloggery-boo will mostly be a chronicle of the random crap I do in my spare time. This crap usually consists of DIY projects, crafts, and cooking, but it's likely I'll give random shoutouts to my favorite things in life--JOHNNY DEPP, MARRY ME!--like theater, music, and relaxation. I may also occasionally express my hatred for stuff like working out and peppers. Sick.