Saturday, August 3, 2013

THE HAPPY LIST.


UM, HI! 
  Real life continues to be crazy. I'm starting to realize that as an "adult," (as in, no longer in college, has a job, pays bills and loans, has more long-distance friendships than in-person ones, and keeping a love life alive) is CONTINUALLY NUTS. This is NOT something other adults tell you before you experience it first hand. Or maybe they tried, but the wisdom didn't seep through my hectic, hilarious college delusion. Because college is not real life. It's just not.

I had visions, nay, fantasies, that after I graduated with my degree, Mr. J and I would naturally get phenomenal jobs because we're awesome, and we'd have an awesome place to live, and we'd be living the middle class American dream of saving money towards our future. We were going to skip off into the sunset. I wanted the white picket fence, people. I still do. 

But somewhere between college--where housing and food and brilliant people willing to share their knowledge with you and always available friends are right at your fingertips--and the white picket fence that contains babies and puppies and unicorns that poop rainbows is chaos.

 I don't remember someone sitting me down to have a REAL conversation about how effing hard it is to find a job you love that pays what you're worth. No one ever told me to get ready to move once a year, or that affording groceries and car repairs and cell phone bills would be a struggle.

I would have a college degree, and that would tell the world, "HEY! You need to hire me because I'm educated and talented and hard-working. LOOK WHAT I CAN DO!" 

Not true, friends. The hard truth is that it can be a downright tooth-and-nail battle to get through the day without wanting to punch a co-worker right in the throat or set fire to every piece of mail you receive in case one of them is a bill. Some days it can be really hard to find something to laugh about (that's not sarcastic or dark). 

But that has to be your focus if you're in a tough patch of your life: take each day as it comes, and within that day, find things that make you happy. Between moving, job searching, missing my family and friends, and the craziness that is being in your twenties, I've had to find some things that make me truly and undoubtedly happy. I'm hoping that this list will help you smile, or encourage you to make your own Happy List to get you through the day. 

Danni's Happy List

1. Cleaning my washing machine. Seriously. Caring for something that spends its life scrubbing stains from MY life makes me happy. Poor thing deserves some love (plus we're in a new place and god only knows what's been in there...the color of the water was absolutely horrifying). Follow the link: I think you'll love Jillee.

2. Vintage Revivals. This blog is so freakin inspiring that it makes my mind explode with joy and DIY ideas. Mandi is adorable and creative and just GAH! Her painted wooden furniture projects especially have my gears turning.

3. Encounters with friendly strangers. I was at Jo-Ann Fabric's looking for dye when, out of nowhere, a tall young man was standing beside me saying, "Oh no, honey, don't  buy that brand. You want Dylon. The colors are so saturated." He then told me about how he has his own clothing company and demonstrated the color with the super interesting clothes he was wearing. He was so sweet and helpful and just unexpected! I call him the Fabric Dye Fairy.

4. The Avengers. Superheroes, a kick-ass ScarJo assassin,  and some seriously fine men wearing tight, muscle-bearing outfits = instant pick-me-up. Especially love Robert Downy Jr. and Mark Ruffalo's performances... gahhhhh so sexy and smart and muscley and brave.... I think my brain melted as I watched it. My favorite line had to from Pepper:


5.  Planning DIY projects! I have so many in the works: revamping 3 lamps, refinishing a coffee table and bookshelf, two chair makeovers, dyeing curtains, spray painting my desk, beautifying the office... is that it?... I have so many going I can't remember them all. I get SO GIDDY just thinking about doing all of that stuff. All of this is blog fodder! It will be here soon :D

6. Baking this amazeballs banana bread. It's indulgent. I am baking some for our landlord who has been just incredible. He just fixed our oven so it seems only fitting to make this for him--he and his girlfriend love it :)


Amazeballs Banana Bread

You can do this in 3 bowls or be lazy like me and do it in one. If you do it in one, start with the butter/sugar, then the banana mush, then the dry ingredients. You'll see what I mean in a second.

In a medium bowl, sift:
  •  2 cups whole wheat flour (if you use all-purpose flour, decrease the milk to 1 Tbs.)
  • 1 tsp. salt
  • 1 tsp. baking soda
  • 1 tsp. baking powder
In a large bowl or your stand mixer, cream 1 cup sugar and 1 stick of room temperature butter. Add 2 large eggs one at a time and beat until smooth.

In a small bowl, mash 3 overripe bananas, then stir in 2 Tbs. milk and 1 tsp. cinnamon.
 Add banana mix to butter mix and combine. Add dry ingredients. Mix only until just combined. Add another splash of milk if its too dry. It should be thick but completely moist.
Pour batter into buttered loaf pan. Bake for one hour and check with toothpick. If the toothpick does not come out clean, bake for 5 minute intervals until a new toothpick does come out clean.
Let cool 15 minutes. Remove from pan. Cool completely on wire rack before cutting.
ENJOY and a happy day to all of you, particularly those who may be on the struggle bus with me.


Much love,
Danni

Monday, July 8, 2013

Fun Summer Recipes!

Real quick: I finally feel motivated to blog regularly again. Share the love if you missed C.C.! I know I missed posting and being engaged in the blogosphere :) To make up for a little lost time, here are THREE recipes to make the most of summer, like cooking dinner on the grill, hanging laundry on the line outside, and picking blackberries.

Sweet Berry Tea

 Place 1 cup of fresh blackberries, 1 cup of diced strawberries, and 10 sliced mint leaves in a large glass bowl. Add 1 cup of sugar and two pinches of baking soda. Use a wooden spoon to smoosh the berries and sugar together.

Boil 4 cups of water and steep 6 bags of black tea for 5-7 minutes.

Pour the tea over the fruit mixture and stir. Allow to sit for an hour.


Pour tea into a pitcher and add 2 cups of cold water.

Let cool and enjoy the sweet deliciousness!


Grilled (& Steamed) Corn

Open the husk enough to remove the majority of the silk thread stuff.

Soak the corn for 30 minutes. We decided to be super outdoorsy and put the corn in a cooler!


Remove the corn from the water and shake excess off. Use a bit of string to tie the husk to the corn.


Grill the corn at about 350 degrees. Turn every five minutes until the ears are burned.


Don't burn yourself as you remove the husk by pulling it toward the opposite end of the ear and then cut the core off.

This is the best grilled corn I've ever had because it has the flavor of grilled corn but the texture of steamed corn. So yummy!


Grilled Turkey Burgers

In a medium bowl, combine 1 lb. of 94% ground turkey, 3 diced garlic cloves, 1 diced scallion, 1 beaten egg, salt, pepper, and enough fresh breadcrumbs to pull the mixture together. It will still be sticky, but you cn easily form 3 or 4 patties. Refrigerate for 15 to 30 minutes to set up.

Because these patties are softer than beef patties, you'll want to grill them on top of aluminum foil and cooking spray.
 

Grill at 350 degrees for 13 minutes on each side. Top with cheese if desired.


We served these with homemade pickles!

Give me a shout if you try out any of these recipes! I hope you're all having a delightful summer :)

Much love.

Saturday, May 18, 2013

Margaritas and a Maxi Skirt: I'm finally back!

Hiya, everyone!

I really don't know where to begin... maybe with stating the obvious: it's been over a month since I last posted. Here's another nugget of truth: I hated being away from C.C., but I took a break to deal with some serious stuff in my non-blogging life. I never intended this to be a forum to vent or complain about my life unless it's the occasional ridiculous story that I just can't keep to myself and Mr. J doesn't find it as funny as I do.

So, I am not going to rehash the things that have occupied my energy elsewhere, mostly because they're shitty and frankly not worth another iota of my brain power.

Instead, I'll let you know that I am okay. I'm dealing with it all one moment at a time, and I am striving to find positivity and balance again. I took a mental health day yesterday and invited a truly excellent friend to spend the afternoon with me.

We made these bad boys: frozen strawberry margaritas.

Isn't this a baller glass? My bff bought it for me on my 21st bday :)
Sippin' on this delightful little fella while sitting in the sunshine, catching up and bullshitting with such an awesome person was a PERFECT way to spend a Friday. Just to up the ante, we also crafted. Say what?!

I decided I would bust out Edith, the amazing little sewing machine my grandmother is lending me to learn how to sew. Seeing as I hadn't tackled a sewing project since Christmas, I was a bit nervous, especially since this was only my second sewing project ever. Then I said, "What the hell?" and decided to consider it a grand experiment! Worst case scenario: I'd still have a yard of fabric to use in another project. Win-win!

Recycled Maxi Skirt

Materials:
dress to upcycle
rotary cutter/cutting mat or scissors
1/2 inch elastic
pins

From the depths of my closet, I dug out a gorgeous neutral-colored maxi dress that I bought on sale years ago and never wore. I feel like many women have at least one of those items in their wardrobe, right? I've had the desire to make my own maxi skirt for awhile, and utilizing a dress eliminated a lot of work. Here's what the dress looked like before:

Sorry this one's a bit blurry. There's my friend, B, crafting away!
I had to set aside the top of this dress to recycle another way. How pretty is that beading?!
Let me be honest: most of the time, I can't be bothered to measure. I used a rotary cutter and cutting mat to cut the dress straight across a couple inches below the bust. I was left with the skirt portion of the dress. I turned the skirt inside out.


Next, I wrapped elastic around my hips where I like my skirts to rest. I added half an inch, and cut the elastic to that length. I then hand sewed the ends of the elastic together to create a loop for the waistband.

The next step was tricky-- I needed another pair of hands. My friend stretched the elastic loop so it was the same width as the fabric. I then pinned the elastic about an inch from the cut end of the skirt, making sure only to pin through one layer.


I had read in a couple of elastic-related tutorials that if you held the elastic taut as you sewed it to fabric, the fabric would gather. However, the tutorials called for a zigzag stitch. I foresaw this being a problem. My little Edith only sewing in a straight line--no snazzy extra features there. But, I reassured myself that whether it turned out well or not, this was great experience. 

So, I proceeded to sew the elastic to the skirt by holding the fabric behind the foot with my left hand and guiding the fabric to the needle with my right hand. I went slowly, trying to stretch the elastic as I went. I had to stop to remove a couple rouge pins along the way.


Well. let's just say it didn't go perfectly. I think sewing the elastic with a standard stitch didn't hold the fabric tight enough to let the fabric gather. As you can see below,  the fabric only gathered in a couple places. I was a bit disappointed, but when I tried it on, I realized it was actually staying on my body! Woohoo! It could still be salvaged!


I figured I would make the waistband look acceptable and dart the side of the skirt if I had to make it smaller. Turning the skirt inside out again, I folded the leftover fabric along to top over the elastic and ironed it in place. After ironing around the circumference once, I folded the top over again and ironed it down. I used a couple pins to keep this new hemline in place. This took the most time of the entire project, but it was worth how it looked in the end.


I sewed along the bottom of the new waistband to keep it all in place. As you can see, it was a huge improvement from how it looked after the initial sewing of the elastic.


I turned the skirt right side out and ironed the whole thing. Viola!

I admit, it's far from perfect, and I made quite a few visible mistakes while hemming the waistband. The advantage is that I never intend for anyone but me to see the waistband. If I were to do another elastic project without a machine that can zigzag stitch, I could either use less elastic to make a smaller circumference, or invest in some elastic thread. I learned so much from this project, and it only took a couple of hours.

Here's my new maxi skirt! I love it! Hopefully you find my adventure helpful, inspiring, or funny.


Best wishes! xo

Sunday, April 14, 2013

Easy refrigerator pickles, for the pickle lover in your life


I know I'm not the only person in the world who loves a good pickle.

But I am one of the pickier pickle eaters out there.

I detest most store-bought pickles. (What is appealing about eating a florescent yellow/green pickle?!)

Not keen on sour pickles. Or sickly sweet pickles. Or whole pickles. Or pickles with too many seeds.

You see how I can easily make my family nuts at picnics, yes?

However, I ADORE homemade pickles. My grandmother makes a mean bread and butter pickle, and I tend to hoard them whenever I visit her.

This does not please aforementioned family members.

My grandmother's solution (bless her, she's a genius) was for me to make my own pickles.

I've never canned anything before, and I am not quite ready to undertake THAT project. She wisely suggested trying refrigerator pickles.

Essentially, these are pickles designed to be eaten quickly after they're made, instead of canned pickles that can be on the shelf for awhile.

I threw caution to the wind: for my first refrigerated pickle attempt,I made up my own recipe.

I know. I'm crazy.

But the crazy is tasty. Very tasty.

 Sweet & Spicy Dill Refrigerator Pickles

This makes a small amount of pickles. Double, triple, etc. to suit your needs.

Wash and slice 1 large cucumber thinly.
Dice 4 garlic cloves.
Layer the cucumbers into clean glass jars (I recommend you sterilize them with boiling water beforehand), sprinkling garlic pieces in as you go.


In a saucepan, heat 1 cup of white vinegar, 1/4 cup sugar, 1/2 tsp. dried dill, 1/4 tsp. onion flakes, 1/4 tsp. red pepper flakes. Heat until sugar dissolves. Let cool.


Pour mixture over cucumbers.


Keep pouring.
                                         

Cover and refrigerate for at least 1 day before eating. These can last bacteria-free for awhile in refrigerator (thanks to the acidity), but they will get mushy if left for too long.


I highly doubt they'll last more than a week, anyways. They're SO DELICIOUS.


Enjoy! xo

This recipe was posted to the following link parties (go check them out! They're great!)


Homemade Mondays

Skip To My Lou

Thursday, April 11, 2013

Sexy Vegetarian Thursday, eggie style!

I'm one of those people who loves to randomly eat breakfast for dinner and brunch-type items at 8am.

I like to experiment with food. Dishes from different cultures and meals with a twist or quirk make me oddly happy. I like following my palette and letting it guide me to create something I envision in my mind.

This week's edition of Sexy Vegetarian Thursday is brought to you by one such culinary experiment. I wanted eggs, but didn't want an omelet or frittata. I wanted sauce, but not pasta. I wanted cheese, too.

I always want cheese.

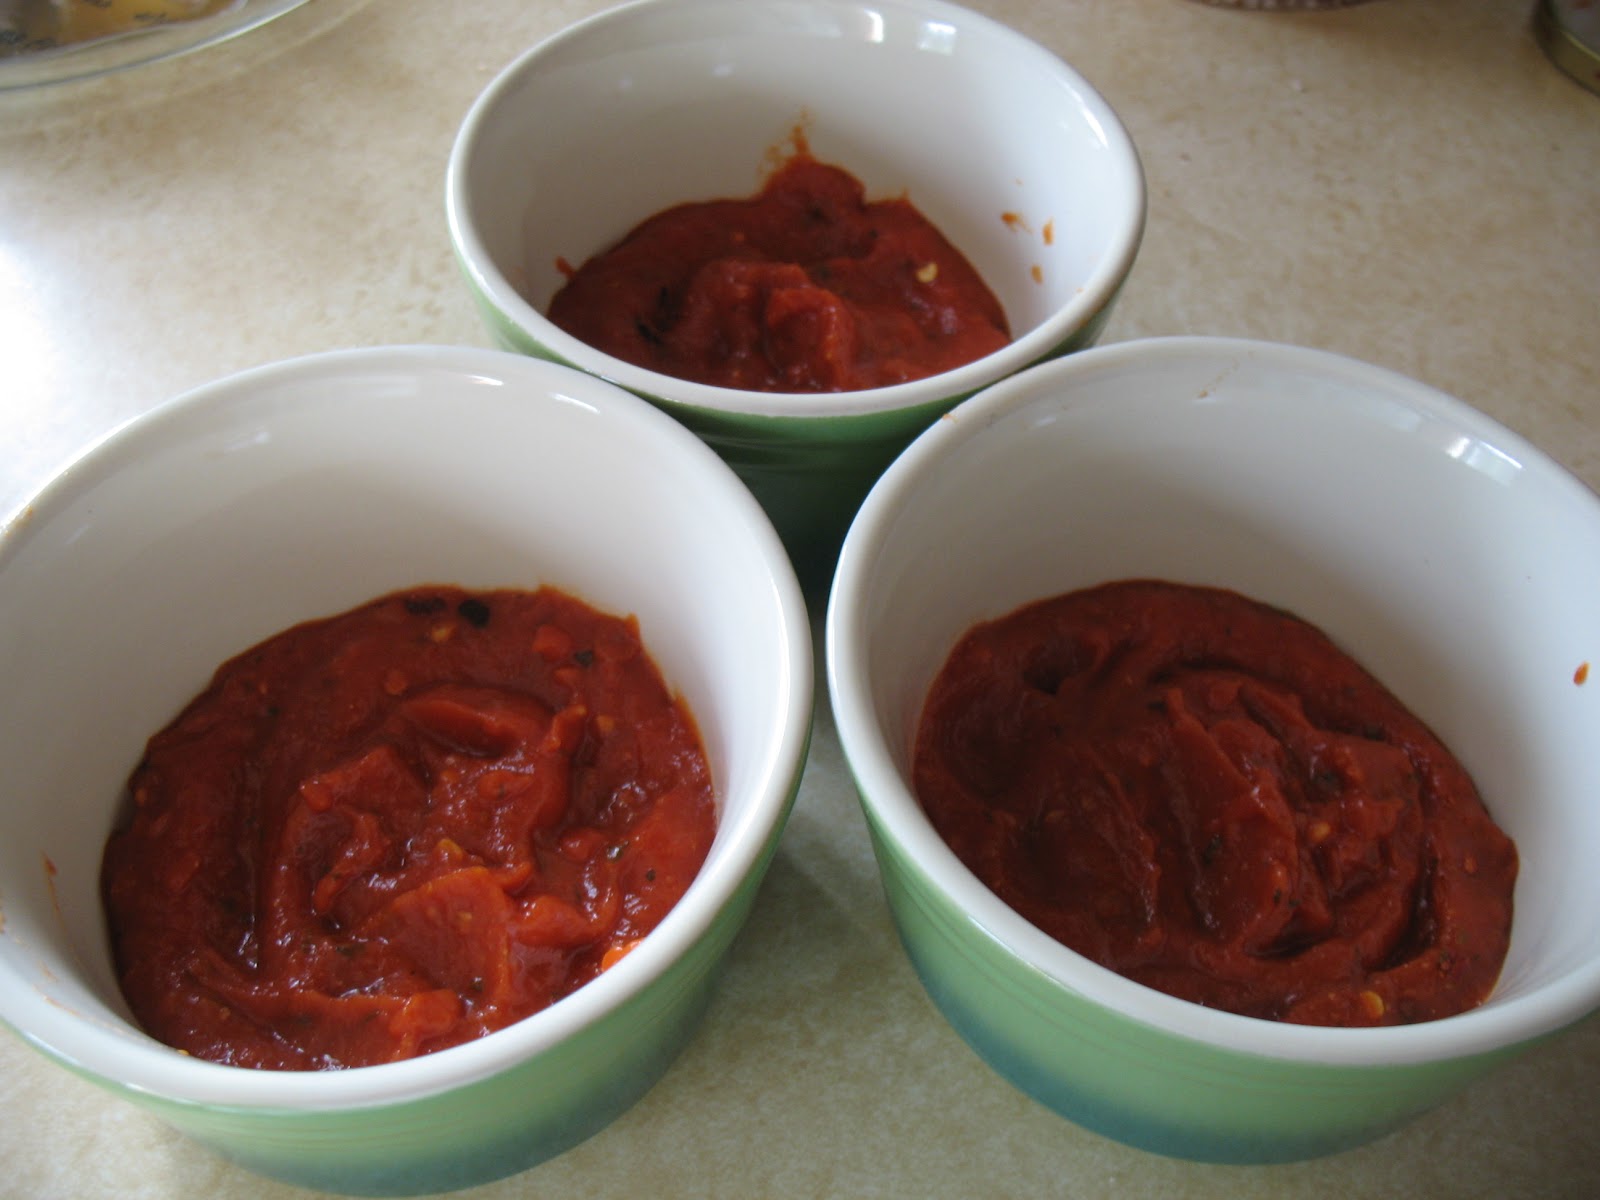
So, I decided to throw all three ingredients into a ramekin and see what happened.

What happened was delightful scrumptiousness!

These baked eggs are inexpensive, indulgent, and yummy! They could work for any meal, which is the kind of flexibility I love.


Baked Italian Eggs

Each ramekin is a serving, and the following recipe makes 3 (2 for Mr. J, 1 for moi!).

Preheat the oven to 400 degrees.

Grease the ramekins using olive oil or nonstick spray.
 

Fill the bottom third of the ramekins with your favorite marinara sauce. Sprinkle desired amount of red pepper flakes on top, and stir to incorporate.


Crack each of the 6 eggs into a small bowl individually to check for shell pieces and any oddities. Place 2 eggs in each ramekin. Sprinkle desired amount of garlic powder, Italian spices, salt, & pepper.


Place ramekins onto a baking sheet. Bake for at least 15 minutes to help the egg whites and part of the yolk to set up. 15 to 25 minutes will result in over easy or medium eggs. For hard over eggs, bake up to 30 minutes. You really want to make sure those babies are cooked...obviously.


Remove baking sheet, and check eggs. Top eggs with a dollop of sour cream or Greek yogurt, then with your favorite grated cheese. Change oven setting to broil.

Broil eggs for 5 to 8 minutes, until cheese is melted and eggs are the way you like them. Serve with toast, fruit, and vegetables.


Enjoy! xo

Tuesday, April 9, 2013

teens on relationships and a sunny breakfast

It may be lame to talk about the weather.

But, HOT DAMN!

It was a perfect day: sunny, few clouds, light breeze, and 65 degrees. I could not imagine having program with teens indoors today without a rebellion either on my part or theirs.

Instead, we played for two hours on the playground. We had chalk, bubbles, swings, slides, and strange plastic dinosaurs that I guess little children are meant to climb. The purple triceratops and green brontosaurus ended up being the perfect "safe" zones for tag. And for hilarious photo ops.

The only "educational" activity we did was to discuss what a healthy relationship looks like and how it ideally develops.

A few funny things were said in this discussion.

Firstly, when I asked the teens to each think of a teen couple they see on TV or in movies, 6 of the 8 of them listed ones I did not know at all.

(Hilariously, another argued--quite persuasively--that Spongebob and Patrick were boyfriends, and the other said Bella and Jacob: her exact words were, "Someone needs to rip Edward apart and burn the body." Almost shat myself when she said that because I COULD NOT AGREE MORE.)

I high-fived her.

For the record, who the heck are Allie & Austin, and Beck & so-and-so from Victorious?? I need to educate myself, obviously.

Secondly, I asked the teens to imagine what their absolute perfect dating partner would be like. Here are some answers (keep in mind they are 11, 12, & 13 years old):
  • "She needs to have long hair, and a job. Because it's important to have a job, and some people look ridiculous with short hair."
  • "Hot and rich." She dug deep for that one.
  • "Uhhhh......"
  • "I'd want her to be the same age as me, funny, smart, and have a job."
  • "I want a smart guy. If I dated someone dumb, I'd prolly get annoyed and have to whack him upside the head." If only you could have heard her tone--sounded exactly like something I would say. "Oh, and he needs a job. And a lot of candy. I love candy. Then he could buy me a membership the gym." Hahaaaa. 
  • "I got nothin." At least she was honest.
 Yup. Today was pretty awesome.

I thought I'd share a recipe that reminds me of this sunshine-y, happy day. It's a recipe I came up with on Sunday morning under pressure because Mr. J had to get out of the house in 45 minutes. Turned out pretty awesome, if I do say so myself.

Sunny Orange Muffins


This make 6 muffins. Double or quadruple as needed.

In a bowl, whisk:
  • 1 egg
  • 1/3 cup orange juice
  • 1 Tbs. vegetable oil or melted coconut oil
  • 2 oranges, quartered, pulp scooped out and chopped roughly
  • grated peel of 1 orange
  • 1 tsp. chia seeds
  • 1/3 cup sugar
  • 1 tsp. cinnamon


Fold in:
  •  1/4 tsp. baking powder
  • 1/4 tsp. baking soda
  • 1 cup whole wheat flour


Divide the batter into greased or lined muffin tin. Bake at 400 degrees for 15 minutes.


Enjoy! xo  


Sunday, April 7, 2013

What exactly does chicken have to do with Harry Potter and Hunger Games?

Hi, friends!

I haven't been on the writing bandwagon this week. I know, that sounds ridiculous coming from someone who started a blog, but my excuse is that I've been reading constantly for two weeks. I finished Mockingjay, the last book of the Hunger Games series, in two days, and I was emotionally destroyed. Did anyone else feel that way?! I felt much worse than after I finished the Harry Potter series. Before I tell you why, let me say this: both epilogues were hopeful in that the Potter and Weasley children could attend a diverse Hogwarts while Katniss and Peeta's children do not have to participate in or be witness to the Hunger Games. Both series end with democracy trumping dictatorship and genocide, a victory sorely won.

The difference between the two epilogues (and the reason I literally cried for an hour and had nightmares for three nights) is that the main characters survive the trauma of war and loss very differently. J. K. Rowling made it clear that Harry is completely committed to living in the present moment. He still mourns the deaths of loved ones, but he can live beyond those experiences to thrive. His thinking appears clear, and he celebrates his family and friends.

Katniss, however, seems to be living in the same mental fog her mother did after the death of her father, an emotionless state that Katniss could not understand or forgive. What little she shares about her life since the war is bleak. The images of her children are vague--she tells only what they look like with few words on more personable details or her connection to them. Katniss seems distanced from her own family, afraid to love them too much or hold them too close: "I'll tell them on bad mornings, it feels impossible to take pleasure in anything because I'm afraid it could be taken away." She is haunted by her past and those she's lost. What stuck with me is how disaffected and void she felt, like she was soul-less but still living (much like a prisoner who endured the Dementor's kiss: crossover alert!).

Even if the ending devastated me, I respect it immensely. Katniss's circumstances after such a brutal war are perhaps just as realistic as Harry's. I wouldn't say that one has more credibility than the other; rather, I like how different the epilogues are and how plausible they seem within the worlds of the two series. Overall, I really liked the Hunger Games series for its gutsy creativity and visceral reality. I appreciate that Suzanne Collins didn't shy away from bold choices, like killing Finnick and Prim, and altering Peeta's memories. It's not a story I could ever forget.

......

Is there really any way to segue from Hunger Games to homemade chicken tenders? "Here's something you could never make in pre-revolution District 12?" Oooh, that's pathetic... Anyways.

Maple-Mustard Chicken Tenders

 Slice 2 boneless, skinless chicken breasts into strips. Use a fork to tenderize the strips.

Mix 3 Tbs. of whole grain Dijon mustard with 2 Tbs. of pure maple syrup and 2 Tbs. of EVOO. Add in 1 tsp. dried thyme, 3/4 tsp. black pepper, and 1/2 tsp. salt. This will be both the marinade for the chicken tenders and what holds the coating to the chicken later.


Marinate the strips in the maple mustard  sauce for at least 1 hour. Overnight would be even better.


Create a little assembly line: bowl of marinated strips, 2 cups of homemade breadcrumbs, and a baking sheet overlaid with a cooling rack or something similar. Spray or rub the cooling rack with oil.


Coat each strip with the breadcrumbs.


Place breaded strips on sheet, like so. Give them a bit of room so they can cook evenly and to allow the breading to crisp.

Bake for  30 minutes in preheated 250 degree oven.


Serve with your favorite dipping sauce!


Enjoy! xo